Intro to Reaper
Reaper stands out as a highly regarded digital audio workstation (DAW) known for its powerful features at an attractive price point. This versatile DAW has captured the attention of both professionals and hobbyists looking for a cost-effective solution to their music production needs.
In this post, we will delve into Reaper's extensive capabilities, its seamless operation across different operating systems, and its utility for everything from recording to using plugins.
Whether you're operating on Linux, Mac, or another platform, Reaper offers a robust set of tools designed to enhance your audio projects. Join us as we unlock the potential of Reaper, providing insights into its core features, performance across platforms, and tips for optimizing your recording sessions with this formidable DAW.
A Review of Reaper
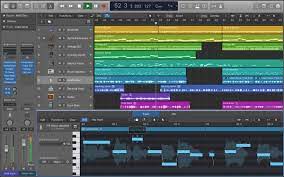
Reaper stands out in the crowded digital audio workstation (DAW) landscape for its compelling mix of features that appeal to both professional audio engineers and hobbyist musicians.
It distinguishes itself with an unparalleled level of customization, allowing every aspect of the software—from the interface layout to the complex routing options—to be tailored to the user's preferences.
This flexibility ensures that whether you're mixing a band's album or scoring for film, Reaper adapts to fit your workflow rather than forcing you to adjust to it.
The interface, while robust, is designed with adaptability in mind, offering endless possibilities for personalization. New users may initially find the vast array of options daunting, but this very flexibility means that with a little bit of exploration and adjustment, the interface can be streamlined to enhance usability and improve workflow efficiency.
This makes Reaper an increasingly intuitive tool for users as they become more familiar with its capabilities.
Performance-wise, Reaper is a powerhouse. It's optimized to run seamlessly across a wide range of computer systems, from older laptops to the latest high-end desktops, ensuring reliable performance even in projects with high track counts and extensive plugin use.
This efficiency, combined with its low CPU usage, makes Reaper a highly dependable choice for complex audio production tasks. Reaper's combination of versatility, customizability, and robust performance underpins its esteemed position in today's DAW market.
Transform your vocals today with our premium presets - discover your perfect sound now!
Expanding Your Sound with Reaper Plugins
Reaper equips users with an impressive suite of built-in plugins, covering everything from EQs and compressors to unique effects and analysis tools.
These plugins, while not as visually polished as some third-party offerings, are renowned for their audio quality and versatility.
Whether you're sculpting the perfect vocal take with precision equalization or mastering a final mix, Reaper's native plugins provide a solid foundation for both mixing and mastering projects.
Their lightweight design ensures minimal impact on system performance, allowing for complex processing chains without overloading your CPU.
When it comes to expanding your sonic palette, Reaper excels with its robust support for third-party VST, VST3, and AU plugins. This compatibility opens the door to an expansive world of sound, from vintage emulation to cutting-edge synthesis.
Highly recommended third-party plugins include FabFilter's Pro-Q 3 for surgical EQing, ValhallaDSP's reverbs for lush spatial effects, and iZotope's Ozone for comprehensive mastering suites. These additions can significantly enhance Reaper's functionality and your overall production quality.
Managing plugins within Reaper is streamlined and efficient, thanks to its flexible track FX chain and plugin browser. Organizing plugins into folders or creating custom FX chains can save precious time during sessions.
Additionally, Reaper allows for real-time FX processing and rendering, enabling swift experimentation and adjustments. For an even smoother workflow, consider using track templates with pre-loaded plugins for specific recording scenarios, ensuring you're always ready to capture creativity as it strikes.
Also Read: The Best Reverb Plugins
Reaper Across Platforms

Reaper on Linux
Reaper's compatibility with Linux is a boon for users preferring open-source platforms, marking it as a versatile choice for audio production.
The installation process is straightforward, involving downloading the Linux-native version from Reaper's official website and following the provided instructions.
For distributions that might encounter compatibility issues, Wine or similar compatibility layers can serve as effective workarounds, ensuring smooth operation.
On Linux, Reaper offers comparable performance to its Windows and Mac counterparts, maintaining its reputation for efficiency and low CPU usage. Users report stable operation even in complex projects, with the added benefit of Linux's robust system performance and customization options.
However, it's essential to note potential limitations regarding third-party plugin compatibility, as some VST plugins may require additional steps to function correctly on Linux.
Despite this, the Linux audio production community actively shares solutions and workarounds, making Reaper a reliable DAW choice for Linux users seeking professional-grade production capabilities without leaving their preferred OS.
Reaper for Mac Users
For Mac enthusiasts, Reaper presents a seamless integration with macOS, leveraging system-specific features that enhance the user experience.
Notably, Reaper fully supports macOS's Retina displays, ensuring crisp and clear visuals that make long mixing sessions more comfortable.
Additionally, it integrates well with Core Audio, allowing for straightforward audio device selection and configuration, and supports AU (Audio Unit) plugins natively, expanding the range of available effects and instruments to Mac users.
Performance-wise, Reaper on Mac stands tall, offering stability and efficiency akin to its Windows and Linux counterparts. Users appreciate its low CPU usage, which is particularly beneficial on MacBooks, ensuring that projects run smoothly without overtaxing the system.
When comparing user experiences across platforms, the consensus is that Reaper maintains its robust functionality and customizability regardless of the operating system.
However, Mac users specifically benefit from the DAW's harmony with macOS aesthetics and core audio frameworks, making it a compelling choice for those entrenched in the Apple ecosystem.
Reaper on Windows
Reaper's compatibility with Windows is a testament to its versatility and broad appeal.
On Windows, Reaper leverages the OS's widespread support and integrates seamlessly with ASIO, DirectSound, and WaveOut audio drivers, ensuring users have the flexibility to work with a wide range of audio interfaces.
This versatility makes it an attractive option for Windows users who require compatibility with various hardware setups, from home studios to professional recording environments.
Windows users also benefit from Reaper's customizability, which meshes well with the diverse ecosystem of Windows-based audio production tools. The DAW's performance on Windows is noteworthy, with efficient CPU usage and stable operation even in large, complex projects.
This robust performance, combined with the platform's support for VST plugins—widely used within the Windows audio production community—allows users to expand their creative toolkit significantly.
Reaper on Windows stands as a powerful, adaptable choice for audio professionals and hobbyists alike, offering a comprehensive set of tools that cater to a wide spectrum of production needs.
Also Read: The Best Speakers for Music Producers
Mastering the Basics of Recording in Reaper
Mastering the basics of recording in Reaper unlocks the full potential of this DAW for artists and producers.
Starting with setting up for recording, the first step is to ensure your audio interface is correctly connected and recognized by Reaper.
Navigate to Preferences, select your device under Audio > Device settings, and adjust the sample rate and buffer size for optimal performance. For recording vocals or instruments, create a new track, arm it for recording, and select the appropriate input source.
When diving into multitrack recording, organizational skills are key. Utilize Reaper’s track grouping and coloring features to keep your session tidy and navigable.
Take advantage of the DAW’s flexible routing options to send audio to different effects or auxiliary tracks for efficient mixing. Non-destructive editing in Reaper allows for seamless adjustments to your recordings without permanently altering the original files.
Optimizing recording quality involves careful attention to input levels to avoid clipping while ensuring the signal is strong enough to capture all nuances.
Use Reaper’s pre-fx volume controls and monitoring features to set levels appropriately before hitting record.
For the best sound quality, explore Reaper’s array of built-in plugins to apply EQ, compression, or other effects as needed during the monitoring phase. By mastering these basics, you can achieve professional-sounding recordings that stand the test of time.
Navigating the Reaper Manual and Support Resources
Navigating the Reaper manual efficiently starts with leveraging the table of contents and the index to pinpoint specific topics.
The manual is comprehensive, covering everything from basic operations to advanced techniques. For quicker access, use the search function in the digital version to locate keywords related to your queries.
Additionally, bookmarking frequently referenced sections can save time during future sessions.
The Reaper community offers robust support through forums and social media groups, where both newbies and veterans share insights, tips, and solutions.
The Reaper forums, in particular, are a treasure trove of information, categorized by topics for easy navigation. Participating in these communities not only helps you solve specific issues but also exposes you to creative ways of using Reaper.
For visual learners, YouTube channels dedicated to Reaper tutorials cover a wide range of topics, from basic setup to complex production techniques. Leveraging these resources enhances your understanding of Reaper, allowing you to dive deeper into its capabilities and connect with a global network of users. Check out the PDF Reaper manual.
Keep Reading: Complete Review of Presonus' Studio One
Concluding our Reaper Review
Reaper stands out as a flexible and powerful DAW, accommodating a wide range of users from beginners to professionals across various operating systems.
Its customizable interface, extensive plugin support, and efficient performance make it a top choice for those diving into audio production or looking to switch from another DAW.
The ability to tailor Reaper to your workflow, coupled with its cost-effectiveness, underscores its value in the competitive DAW market.
Embarking on your audio production journey with Reaper opens up endless possibilities for creativity and innovation. Whether you're recording, mixing, or mastering, this guide aims to provide a solid foundation to harness the full potential of Reaper.
Dive into its features, experiment with plugins, and engage with the community to elevate your music production skills. Reaper is more than just software; it's a gateway to realizing your artistic vision.


